
The most important thing you can do before beginning to build your family history book is to create a content plan. Whenever we take on a project of this size, it’s always best to invest in some time upfront to think through your project.
Why you need a content plan
If you start to write without a content plan, you’re likely to waste a lot of valuable time staring at a blank screen. This is because you’re trying to simultaneously figure out what you want to write, who you want to write about while trying to write. You don’t have a clear idea of structure, organization and contents of your book.
With a plan, you’ll be more likely to start writing immediately. You’ll have a clear outline of each section, chapter, story and profile, the contents and how each will flow into the next.
By creating a content plan, you also engage your brain. The process of thinking your book out in advance will result in you brainstorming about your book as you work, drive, relax, even sleep. You will continually be searching for ideas and making connections.
Trying to put together a family history book without a plan is an invitation to disaster. Most likely resulting in false starts, wasted efforts and low productivity.
You don’t have to know the content of each paragraph, each sentence, but you should aim for a well-thought-out strategy.
Step 1. Start with a Brain Dump
- The best place to start creating the content for your family history book is with a brain dump. Dump all your ideas you have about your book into a mind map.
- Start by identifying the focus of your book? One ancestor, a couple, a family group or one or more surnames?
- You then want to break down the focus into smaller components, subtopics, maybe even themes.
- What are the main points you want to cover? With a highlighter, mark each of the big points with a single colour. These might become sections or chapters in your book.
- What are the subtopics? These will become individual stories or profiles within the chapters or sections of your book. Highlight each of these with another colour.
Step 2 Organize your brain dump
There is no one single right way or tool to organize your family history book. What might be a productive process for one can be very frustrating an inefficient for another?
But there are many planning tools available to help you take your brain dump ideas and organize them. We listed a selection below including both low-tech and high-tech.
- Lists & outlines. After identifying the “big picture” of your book, the next step can be to expand your list from the main idea into key supporting points for each chapter in the form of a simple list.
- Index cards. Index cards are another time-proven writing tool. I use index cards to organize my stories, but they can be equally beneficial in assembling a book. Each card contains an idea which is then inserted into the right location in the organization of your book. Index cards can organize the topics of a book or the scenes and summary within a family history story.
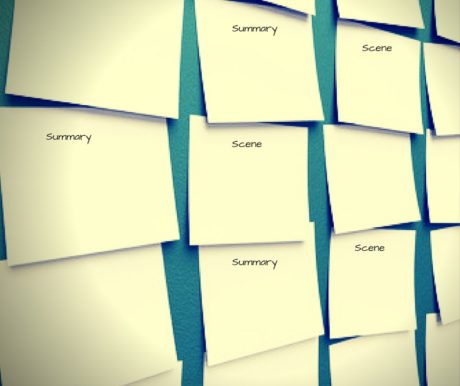
- Sticky notes. Sticky notes work much like index cards and help you to identify and organize your thoughts quickly. Add just one thought, idea or supporting detail to each sticky note, then attach the notes on a wall or whiteboard or tabletop. Move them around to organize your book. You can use different-coloured sticky notes to colour code your idea.
- Create a table. Using a word processing program, like Microsoft Word, you can create a detailed content plan your book. For example, create a 2, 3 or 4 column table in Word, you can list your book into sections, chapters and stories and profiles.
- Spreadsheet. Consider using a spreadsheet program, like Microsoft Excel, to plan your book. The process is similar; in the first column, enter the title for each story or profile. In the second column, summarize the main idea associated with each story or profile. In the third column, enter the events and ideas you want to include. Check out the spreadsheet created by one of my students in our recent course, Plotting a Family History Story. This is part of an outline of a family history story. But the same can be done to organize an entire family history book.

- Mind maps. I use mind mapping software for all my projects in the very early stages to get down my ideas and help organize them into a logical process as I mentioned above. But mindmaps can also be used to complete your outline. You can make your mind map on a simple piece of paper, a whiteboard or in a digital program like Scapple. I use Scapple for all my brainstorming tasks because first I can use it do braindump but then easily rearrange my brain dump into a logical order for my book. I rearrange as many times as I like never killing a tree.
- Digital Storyboard. Another option is to create a digital storyboard. One of my favourite digital storyboards comes in the Scrivener software. Scrivener uses a digital corkboard with digital index cards to help you outline and organize your story and book. Watch this video to learn how to make a storyboard in Scrivener.

Before diving in feet first to create a family history book, take the time to brainstorm and organize your thoughts into a content plan. Explore the various options to outline your project and choose the one that works best for you.

The sooner you come up with your own efficient way of organizing your ideas before you begin writing, the sooner you can embark on your journey of writing your book!
Brainstorming and organizing a content plan is just two steps in the process of building a
family history book. In our new workbook, Build a Family History Book, A Planning Guide to Getting it Done, we identify an 8-step process for creating a family history book. It includes numerous templates to help you clearly define and organize the content for your family history book and the process to get you across the finish line.


This gave me some great ideas. I am one who wants to tell about my ancestors but have no idea of where to start.