Category: Writing Tools

How Scrivener Can Help You Complete ‘The Challenge’How Scrivener Can Help You Complete ‘The Challenge’


If you haven’t heard of Scrivener before or maybe you have, but you’re not sure how it works or what all the fuss is about, then I would like to take this opportunity to give you a brief explanation. Scrivener is a writing management software program that has amazing capabilities. It’s a fantastic app for writing long text such as family history stories but offers you many features that make it much more effective and efficient then let’s say Word.

Scrivener is built on four core ideas.

  1. Write your story in sections as small or as large as you like and easily rearrange them.
  2. Add synopses to sections, so that it is easy to work with an overview of your manuscript.
  3. View research and other parts of your writing side-by-side with your writing.
  4. Export your work using different formatting for different requirements.


Of course, this is stating the program very simply. While I’m confident, you can see how this program can benefit you in writing your family history stories. Let’s take it one step further and get a little more specific with a few tips on how it can help you in our upcoming Challenge.

Set Your Targets.

You can set a goal of how many words you want to write each day. Scrivener will keep track of your targets for you. Knowing you’ve met your target for today will make it that much easier to write tomorrow. You’ll find Targets under ‘Project’ the menu.

Incorporating Your Storyboard into Scrivener.

In our Challenge Prep Course, you learned how to create a storyboard, a story plan so that you know exactly what you are going to write each day during these four weeks. Create your storyboard in the Research section of your Draft. This will allow you to reference the storyboard as you go but will also enable you to have the freedom of keeping the storyboard as a separate entity from your draft.

Jump Between Sections.

It’s so easy in Scrivener to jump around and write different chapters or scenes as you see fit. You don’t have to write in chronological order. If you followed our Challenge Prep Course and created a storyboard then you can pull anyone of your scene cards and write.

Create Some Target Points.

If you don’t have a storyboard ready you can still create an outline to help guide you.
In the Draft folder in Outliner mode, create some blank documents with titles and short synopses for each of the critical scenes you identified for your storyline. This will help to tell you where you are going. Not as detailed as a storyboard but it can still be very helpful in keeping you focused. However, you can work towards filling in the spaces in between. They’ll sit in the binder and make sure you know where you’re going. If your story changes direction, you can change them or delete them as needed. Having a destination can help you to keep moving forward even if you decide to change course later.

Import Your Inspiration.

In Scrivener, you can split the editor, so that half of your screen is your story and the other half allows you to view your research. This can also be a great help when you are in need of inspiration. For example, when it comes to describing the setting of your story, take some time to search the Internet for some setting pictures of the location of your story. Upload them to your research files and then when it’s time to write that setting you’ll have inspiration at your fingertips.

Make a Research List in Document Notes.

This is probably one of my favourite tips. When you are writing the last thing you want to do is stop writing and get pulled on the Internet doing research. Keep your writing and research times separately. I like to use Project Notes to keep me on track. In the Inspector, under Project Notes, I create a new note that I’ll title Research List. As I’m writing and I come across something that I need a little more information on, rather than leaving my writing, I will make a small note in my manuscript where I want the information and then add the item to my Research List. When I’m not writing and I have some time, I can pull up my research list do some research.

Scrivener Special

This year during the Family History Writing Challenge, I am going to offer some small tips in our Daily Dose emails on using Scrivener and helping you to improve your use and knowledge of Scrivener. If you’ve been sitting on the fence about using Scrivener then this is the year you may want to give it a try.

 A Discount From Scrivener

Scrivener has been kind enough to create a coupon code that will give you a 20% discount on the purchase of a standard licence for either Scrivener for macOS or Scrivener for Windows. For your discount use coupon code: FAMILYHISTORY
If you don’t yet own Scrivener, you can download the 30-day free trial. Click Here.

 A Discount From Us

In addition to your Scrivener discount, we are offering a 30% discount off our eBook Scrivener for The Family Historian. It regularly sells for $9.99 we are offering it for $6.99. This price is in effect for the next 72 hours.

Extended to Monday Jan 22, 2018.

Use coupon code: challenge2018
If you’re still not sure about Scrivener, check out our Scrivener Video Page where you’ll find videos that will give you a look inside Scrivener.

10 Tips to Score Big with the Family History Writing Challenge10 Tips to Score Big with the Family History Writing Challenge


  1. Create a daily target goal. It’s important to understand how much time you can dedicate to writing each day and how many words you can write in that timeframe. Do those targets coincide with your goal? You have to do the math and set realistic and expectations for yourself.


  1. Choose an Ancestor to write about. You can’t possibly write your entire family history in 28 days. However, you can choose one ancestor and one story that you can write about during these 28 days. Don’t overwhelm yourself. Start with one story, one ancestor.


  1. Take some time to get organized. Gather your research together and create a workflow. It’s important to get organized before you begin to write so that you actually spend your time writing and not looking for your research. You’ll be a much more productive writer and find the process that much more enjoyable.


  1. Complete an ancestor profile. Dig deep and learn as much as you can about your ancestor. The more you know, the more confident you will be about writing their story. A profile is a vital tool to fleshing out your ancestor and getting to know him or her in-depth. You’ll find an excellent ancestor profile in our workbook, The Authentic Ancestor.


  1. Create a timeline of your ancestor’s life. Timelines are fabulous tools to help you understand what you know, what you don’t and to help you find your story. Don’t miss this step.


  1. Identify your ancestor’s story? We don’t just want to tell a chronological tale of an ancestor’s life from beginning to end, that would be boring. Instead take the time to find your ancestor’s goals, motivations and the risks they took to meet their dreams.


  1. Understand scene and summary. Family history stories are written using the genre of narrative nonfiction. Narrative nonfiction uses scene and summary like building blocks to create a story. Make sure you understand this concept as it is at the core of writing your family history stories. It will also help you in creating your storyboard for your writing. Our workbook, Crafting a Scene is an excellent resource for learning scene and summary.


  1. Create a storyline. A storyline is like a timeline but different. It is the timeline for your story. Identify the key scenes that will carry the story and organize them into a storyline. A storyline will help you to create an entertaining and suspenseful tale that will pull your readers along. You can learn to create a storyline in our workbook, Finding the Story.


  1. Create a 4-week storyboard. A storyboard is your map for writing. Using index cards, you can outline your storyboard using scenes. Once you create your storyboard, it will serve as a great visual reminder of your writing plan, day by day. A storyboard will keep you focused and on track. Want to learn more about storyboards consult Crafting a Scene.


  1. Create a daily schedule and your writing place. Make sure you plan your writing and make it a priority, at least, for the next 28 days. Also, you need to identify a place for writing, a desk or table, you can claim as your writing space. These are essential steps to completing the Challenge with success and making it a priority for the next 28 days.


If you want to meet with success this year, you need to make writing your family history stories a priority, and you need to come with a plan. We cover all 10 of these steps in detail with worksheets in our Family History Writing Challenge Prep Course.

This year, score big in the Family History Writing Challenge. Be ready to write.

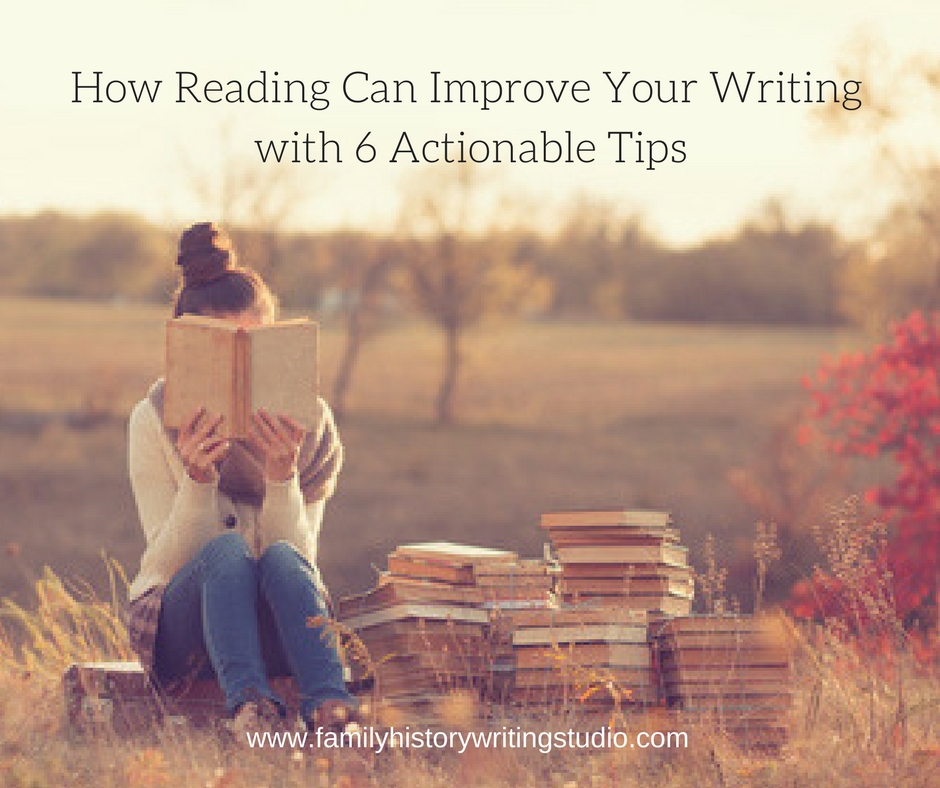
How Reading Can Improve Your Writing with 6 Actionable TipsHow Reading Can Improve Your Writing with 6 Actionable Tips


“If you don’t have time to read, you don’t have the time (or the tools) to write. Simple as that.” —Stephen King


I believe three things make you a better writer.

Learning the craft of writing.

Practice, practice, practice.

Reading books by other authors.


I can help you to learn the craft of writing. The practice, well, that’s on you. So today,  let’s address the third item on the list, reading. Let’s first look at why reading can make you a better writer.

A good writer should read for pleasure but to also learn the craft of writing. When we read the books by other authors, styles, voices and other genres, we expand our knowledge.  Most importantly, it presents us with writing that’s better than our own, and through osmosis, as well as applying the techniques it helps us to improve our own writing. Reading can help you to expand your vocabulary and to craft better sentences. It helps you to understand language better. Quite simply reading helps you to learn from the best and gain new knowledge.

Reading can help you to understand how others think and process information.  This is an important skill to learn if you wish to express yourself through the written word to others. When you analyze what you read and share it with others, you learn to understand a book and in turn convey that understanding to others.

Reading reveals the secrets of a writer’s job in practice. And finally, you will find reading will offer inspiration.


6 Tips for Improving Your Reading Skills


  1. Establish some good reading habits.

    Dedicate a set amount of time each day for reading. I like a minimum of 60 minutes. Somedays, I will read more. But no less than 60 minutes every day. Carry your book with you to maximize your time. Consider making a book list and plan your reading for the year. I choose a minimum of 24 books each year. That’s 2 books a month. My goal is to improve on this each year. Choose your books wisely, plan your books, read from a variety of books from classics to trash to contemporary literature. Read outside your genre. Join a book club – it forces you to read books outside of your genre, to read with a deadline and to read with a critical eye.


  1.  Take notes.

Break down the stories you read. Analyze character, plot and theme. Highlight passages, make notes of words or passages that stand out for you and the effects they create. Make notes throughout the reading process. I love Kindle for this reason. I can highlight passages and make notes right in the Kindle. After finishing the book write a one-page Keep a binder with your one-page summaries of each book you have read.Write reviews, Amazon, Goodreads, or consider a book review on your blog. It helps you to analyze the book and think about the story with a more critical eye.


  1. Consider creating a reading journal. 

A reading journal combines the skills of reading and writing. You record your impressions and ideas about a book you’ve read in your journal.  A reading journal will help you record the not only the feelings it created within you as you journeyed with the characters but the writing lessons you learned. It is worth taking a few minutes after each book to record your thoughts in a reading journal. All these things can help you become a better, offer inspiration and build your confidence.


  1. Try the techniques you’ve learned in your writing.

Experiment with what you discovered, and then give the techniques you’ve discovered a twist to make them your own.


  1. Don’t read more than two books at a time

I recommend limiting the number of books that you read at once. If you do read two books at a time, read from two different genres, for example, read a fiction and nonfiction.


  1. Enjoy your reading.

Don’t waste your time reading books you are not enjoying. Life is too short to read a book you dislike. But before you put it down learn from it. Identify why you are struggling. Write down your analysis of why the book is not landing for you before you move on. We can learn from the bad books as well as the good ones.


To learn more about how to read to write, I recommend. How to Read a Book by Mortimer J. Adler and Charles Van Doren. For more books visit our Writers’ Resource Page.  (affiliate links) 


The Three Spaces to Organizing Your Family History WritingThe Three Spaces to Organizing Your Family History Writing


Whether you’ve started writing your family history book or you’re still in the ‘thinking about it” stage, the process can be a tad overwhelming. As family history writers we have a lot to manage when it comes to writing a book. Let’s just consider the writing, for example, making sure we have all the necessary information going into our stories, like setting and characterization and a good plot and then handling the editing and revisions. Of course, we also have mountains of research that we will have to draw on throughout the writing process. We will need to make sure we are creating accurate citations and a bibliography of our references. Finally, we will want to add pictures to enhance our words, do we have a plan for managing them?

Without a well thought out and practical workflow, a family historian can waste a lot of time shuffling papers, and this can become frustrating and confusing and often result in an abandoned project.

I highly recommend you create yourself a writing workflow that consists of three organizational spaces; your writing space, a reference management area, and a research organizational space. Let’s look at how to set these up so that you can get to the finish a line a little bit quicker.


Gathering Your Research

It’s important to gather your research, primary documents, pictures and social history research in one place, where you can keep them organized and readily available. You need to choose that place and set up a filing system that works for you. A big part of the planning process is having a detailed knowledge of your research and having it organized and readily available to you.

Much like historical fiction writers, family history writers must give much thought to the history and timelines of the world around their characters. We must re-create that world for our readers, impossible to do without in-depth research. Having your family history spewed across various files, programs and computers can be a time waster in writing. You need to create a nice neat workflow, and your first stop is a home for your research. A few tools available include programs such as OneNote or Evernote. I prefer to create a project binder in Evernote.  I admire Evernote and its ability to sync across all my computers, so regardless of where I am working I have access to my research and love the organization of the program. It’s a personal thing. Give both a try, find your preference.

In Evernote, I create a binder for each surname I’m covering in my book. I create a notebook stack. In that stack, I create notebooks that can be dedicated to each ancestor. In each ancestor’s file, I store all the necessary documents, pictures, family group sheets and pedigree charts for each ancestor in this particular story. I also create files for setting and social history. Setting up these files is simple. The work comes in rounding up all your research. It can be a big chore but will make your task of writing your stories so much more enjoyable. The work of gathering your research is beneficial in of itself.  It allows you to become reacquainted with your research, helps you identify holes and ask questions.

As I begin to write in Scrivener , my chosen writing software, I can then quickly pull the research I need into Scrivener’s research area. It’s right in front of me while I write, ensuring accuracy and there is no time wasted shuffling papers and clicking through my digital files looking for my research.


Managing Your Citations and Bibliography

Creating a management system for citations and a bibliography is the second step in my writing workflow. Without a plan for citations and a bibliography before you begin to write you can end up with a massive task when you are done writing. It’s important to keep track of your references as you work through your story. It doesn’t mean you have to create citations as you write, you can handle these as two separate tasks so as not to disrupt your creative writing process. However, it doesn’t mean you ignore them and leave it all to the end.

As I place citations into my writing in Scrivener, I pull them from a number of sources, my reference manager, my family tree software, RootsMagic, or I create them manually if necessary, for instance with Evidence Explained by Elizabeth Shown Mills as your reference guide. You can learn how Scrivener handles citations and works with a reference manager in my new guide, Scrivener for the Family Historian.

You’ll also find yourself heading to the Internet or an Archive for additional information, usually social history, as well as world, regional and local history. A reference manager can easily capture this information with browser apps.

Citation managers are wonderful tools that allow you to organize your sources for creating citations. They make the task quick and easy, keeping you from spending too much time away from writing, looking up sources and formulating citations. They also make creating bibliographies a fast and painless task. Three citation managers I suggest you consider are Zotero, Papers, and Refme. Take them for a test drive; find one that works for you. Again take the time to load up your citation manager with your sources in advance of writing. As you begin to write your stories, you’ll have your sources readily available and can add to your list as required. When you reach the end of your project, your bibliography will be a breeze as most reference managers will automatically generate one for you.


Managing Your Writing

The final and third essential element to my writing workflow is my writing software. While most of you are probably using Word, I chose to move my writing to Scrivener about 5 years ago.

What makes Scrivener such an exceptional program is its’ ability to handle a large project. Rearranging your text, chapters, and sections and just having the capacity to get a big picture view of your book or story is worth the prices of the program. Only $40.  It also has the capability of being extremely flexible. Every writer is unique and wants something a little different in their writing space, Scrivener offers that flexibility. Finally, Scrivener can take your project from the earliest stages of planning with its digital corkboard right through to publishing, whether that be a paperback, hardcover or ebook.

Before you begin to write, establish a writing workflow, a process that you are going to put in place to manage your research, your references, and your writing.  Make writing your family history productive and organized but most of all let’s get to the finish line and get those family history stories published. A great workflow can help get you there.


4 Steps to Structuring Story Scenes4 Steps to Structuring Story Scenes


If you’ve made the decision to use creative nonfiction to write your family history story then at some point, you’ll need to consider how you want to structure that story. In fiction writing, we call this the plot, in nonfiction, structure, but it is for all intense purposes the same thing. We want to consider the order in which we are going to tell the events in our story so that they bring the biggest impact to the reader.  How will they best deliver suspense and tension for the reader and bring them on an emotional journey with their ancestor. The structure is critical to keeping your reader tuned into the story and turning the pages to the end.

Here are four steps to consider when organizing that structure for your family history story.

Before I start any piece of writing, I brainstorm my ideas about a story. I jot down the scenes I see in my head, mull over ideas, themes, and the ancestors I’ll include in the story. I consider from whose perspective I will tell the story, which ancestor will be my primary ancestor. I think about my ancestor’s goal and his motivation. I consider what obstacles he had to overcome and what was at risk if he didn’t reach his goal. I often do a lot of this brainstorming in a mind mapping software called Scapple. Scapple is from Literature and Latte, the same great company that makes Scrivener. Once I have all my rough ideas down in a mind map, I begin to see if I can shape them into a story that I feel can withhold my reader’s attention.
Now with my mind map in hand, I follow these four steps to organize those ideas into a story plan.

1. Establish Major Events. 

First, I identify the major turning points or events that happen in my ancestor’s story.  I determine these major events by asking myself did this event force a change in my ancestor’s life, were they obstacles my ancestor needed to achieve to reach his goal. I like to use a story map, a visual tool, to plan out these events. I make a list of the biggest and most critical events I want to include and how they relate to my story question. I plot them on a story map using a traditional narrative arc that shows the rise of action and tension in the story. Sometimes, it takes some playing around until I feel I have the right events, in the correct order.

While doing this, I keep in mind the general order in which they’ll appear in the story, particularly in respect to the basic three parts of a story. I look for the beginning with an inciting incident that pushes my ancestor out of ordinary life, a middle crisis that works toward that most critical moment and then the final climax, when my ancestor overcomes his last obstacle that eventually leads to a resolution.

2. Look for the Layers of the Story.

Next, I look at the layers of my story. There are three layers to a story. First, we have the dramatic action, which is the physical action. We identified the physical action already through our events in step one.

Secondly, I look for the internal conflicts, the flaws or weaknesses in my ancestor’s makeup that holds him back from his accomplishments, which he eventually overcomes to reach success.

Thirdly, I look for the meaning, what will my readers take away from this story. What universal importance can my readers identify with in their ancestor’s life?

My goal is to have all three layers in my story. Sometimes they won’t always be evident immediately; it might take a draft or two for them to reveal themselves. But eventually they will show themselves. When writing these layers into the story, we want them intertwined. The more intertwined they are, the better. It’s my job as the writer to make sure as the story unfolds, to braid  the strands together as smoothly as possible, until, by the end, the reader can’t easily distinguish where one starts, and one stops.

3. Create the Framework of the Outline.

I then create a storyboard grid that will serve as my tool to outline my story. I place my key plot points those critical turning points we plotted on our story map, and we write them on a storyboard grid in three distinct sections, the beginning, middle and end. I then begin to fill in the scenes that lead me from one major turning point to the next. On index cards, I write a couple of sentences identifying what each of these scenes looks like. I’ll also decide where I need summaries to help me move from one scene to the next.

4. Outline the Scenes.

Once we have a good outline of scenes, we can begin to expand the few sentences that are on each index card. Develop the scene that you imagine by continually expanding the few sentences you recorded on each index card. Eventually, these few lines that you outlined can now begin to develop into a full scene. Before long, scenes slowly become chapters, and chapters become a book.

That’s it, 4 steps to outlining your story scenes and organizing them.  Taking a few minutes in organizing your ideas into a plan before you begin to write goes a long way to keeping a story organized, it will hold off that infamous writer’s block because you will know what to write each day. It also generally results in a lot less rewriting later if you start with a plan at the beginning.

You’ll find much more about plotting and outlining with scenes, how to use mind maps, story maps, a story grid and index cards to structure your family history story in my new workbook, Finding the Story, now available in our store.


20 Reasons You Should Blog Your Family History Book20 Reasons You Should Blog Your Family History Book


I believe in the paper book especially when it comes to leaving a lasting legacy of our family history. Don’t get me wrong, I own an e-reader, and I love technology, but paper books remain for me the best choices to record our family history stories. Paper has proven to stand the test of time, and it remains the best option for leaving a legacy for future descendants.

Who knows where technology will lead us in the years to come.  I do know that printed books have been around for thousands of years, and despite our advancements in technology they continue to hold on.  You do not have to worry about whether your stories will be found in the vast world of internet or whether your information saved on your computer or CDs can be opened and accessed by your descendants. Books don’t require any special technology to read them.

However, I also believe that we need to consider today’s technology for reaching out to our living relatives.   I hear it over and again. Family historians tell me how their family is not interested. But we need to consider how and where we are delivering these stories.

E-books, blogs, e-newsletters, and Facebook are just a few ways we can convey our stories to our living relatives.

To reach out to our children and grandchildren, we need to deliver our stories to their laptops, tablets, and smartphones. We need to address our family, particularly the younger generation where they live – online. We need to distribute our family history, in short, digestible stories, that fit today’s fast-paced lifestyle.

Enter blogging, an excellent tool for providing your family history stories in small, easily digestible snippets for today’s generation.

However, blogging has an added advantage. Not only can you use it as a tool to entertain and educate your living family, but you can also curate those blog posts into a paper book to leave for your descendants. Family history blogs give you the advantage of addressing today’s generation but also leaving your stories in a printed format for tomorrow’s generation. We need to focus on both so that our descendants will find our stories.

Family history blogging offers a variety of benefits for family historians and should be taken seriously as a means of bringing your family history to the online world and in a printed book.

Here are 20 benefits you can gain from blogging your family history book.


  1. Simplify an overwhelming project–breaking down the task of writing a book into small blog posts.
  2. Organization – short blog posts help you to organize your book into chapters, isolate themes, and ancestors to focus on.
  3. Establish a writing routine – learn to write on a regular schedule compiling a collection of narratives.
  4. Develop your writing skills –with each post your writing will improve. (I promise)
  5. Find an audience for your book – introduce yourself as a writer to not only your family but a worldwide
  6. It’s free – write a blog for free. Work out your stories before you invest in printing costs.
  7. Get feedback from readers on your stories.
  8. Create an email list of readers who may want to buy your future book
  9. Draw out distant cousins and find new leads on brick walls.
  10. Promote your genealogy skills and or business.
  11. Develop your social media skills.
  12. Produce material to share with your social media networks.
  13. Test book ideas before you invest a great deal of time in writing them.
  14. Build your authority as an expert in your field.
  15. Reach a younger generation where they live – online.
  16. Leave a legacy online for future generations to find.
  17. Increase your income.
  18. Attract an agent or publisher.
  19. Attract media to your business.
  20. Accountability and deadlines – hold yourself accountable to an audience to produce content in a timely and consistent manner.

Do you want to learn how to write a family history blog? Join our Family History Blog Writing Course, our first online course in The Family History Writing Studio. Learn to write and publish your family history one post at a time!

 Family History Blog Writing Course

This intimate, hands-on workshop will assist you in outlining and writing content for your family history blog for the purposes of curating your stories into a family history book.

Begins Jan 3rd. 2017, Registration now open.

The Writer’s NotebookThe Writer’s Notebook


The writer’s notebook, it’s not a diary or a journal but a valuable tool to help you develop your writing skills.  It’s a place to be a writer.

A writer’s notebook can help you develop your writing skills through a variety of ways.

  1. A writer’s notebook will help you to pay attention to the world around you. By recording events, ideas, dialogue, people that you come across in your day, you become more aware of your surroundings, the setting, how people interact. In your notebook capture what moves you in the day. Perhaps it was a conversation you overheard, or person you saw, or something in nature that caught your attention. Write it down, explore what it means to you. Practice transforming what you see, hear, smell, touch, and taste during your day in to words on the page.


  1. A writer’s notebook will help you develop ideas. Your book is a place to capture seed ideas. Whether they are ideas for stories or scenes or even if you’re not sure what you plan to do with them.  It’s a place to nurture ideas, keep them safe until you’ve ready to explore them further.


  1. A writer’s notebook can help you develop your creative writing skills. Practice scene writing, dialogue and descriptive writing. Heard a conversation,  recreate it in words on the page, what did they say, how did they say it. It can teach you to listen. It can teach you to be aware to details.


  1. A writer’s notebook can help you to expand your vocabulary. Record favourite words, unusual words you hear in your day, or a new word you’ve recently learned.


  1. A writer’s notebook is a place to explore your memories bring them out of your head and onto the page.


  1. A writer’s notebook is a place to map a story, draw a plot line, sketch a setting, or draw a character, maybe an ancestor?


Spend 10-15 minutes a day free writing in your writer’s notebook. Carry it with you throughout the day. It will help you to develop your voice and your sense of self as a writer.


Don’t restrict your entries to family history thoughts and ideas. Our ancestors lived in the real world. They interacted with the world around them. Observing your world today can help you add tremendous detail to your stories and help you to learn the tools of character, setting, dialogue and description enhancing your creative writing skills.


Here are a few prompts to help you get your notebook started.


  • A gesture, word or phrase you found interesting
  • A conversation you overheard
  • An interesting person who you met or observed
  • A person from your past, you want to remember
  • A description of a photograph
  • What you see outside the window
  • Surroundings you may have passed in your daily travels
  • A quote you heard today
  • A dish or meal that you made or ate, note its characteristics using all your senses or just one.


One thing is certain, to become a better writer; you must be an observer of the world and you must practice writing.  Starting a writer’s notebook is an opportunity to incorporate both into your daily routine.


The Tools of a Family History WriterThe Tools of a Family History Writer


One thing about writing, you don’t need a lot of tools to write, a pen and paper if you really think about it. However, we’ve come a long way from pen and paper, there are all kinds of tools to make writing a litter easier. Of course, I mean in terms of the act of writing, nothing I share below will do the job for you but they can organize you and make it easier to plot and rewrite and edit. Saving you time and frustration and those are all good things with today’s busy schedule.  There is no point going old school when you really don’t have to. Here’s my list. It is hand-picked for the family history writer.

Organizational Software

Before you begin writing I strongly suggest you put in to place a program or programs  to help you manage your research and create a workflow for yourself. My recommendations for assembling the necessary research for a particular story would be Onenote or Evernote. They are both exceptional tools.  Pull all your research together for a particular story in to a binder  in either tool. Makes for easy reference and keeps you from being distract by all your other research. Keeping your research organized keeps the brain focused.  Also choose a citation manager such as Zotero or Refworks .  Zotero is free, while Refworks has a price. It’s hard for me to suggest one, as they all work a little differently and it will depend on the scope of your project and your own personal preference. Choose one, and assemble your sources along the way. I cover creating a workflow in further detail Getting Ready to Write Guide. Thinking ahead and creating a workflow with organizational software goes a long away from you feeling like you’re drowning in a sea of research.

Writing Software

When it comes to writing your family history stories, Microsoft Word will be the go to for most of you, and Pages if you’re on a Mac. However, several years ago I started using Scrivener for writing all my articles, stories, and ebooks and I’ve never turned back.  I’m not going to spend a lot of time discussing it’s merits here. I’ve written many articles on the subject and created some videos on my You Tube Channel showing the family history writer how it can serve them in their writing endeavours. I will just add that it is the best $40 I have ever spent on a piece of software, not just writing software, any software.

Visual Aids

I love all visual aids, I use two mindmapping programs, imindmap, which is a little more formal lots of bells and whistles and as well as Scapple. Scapple is from Literature and Latte, same developers as Scrivener. I use it for those quick mindmaps of random I ideas I want to quickly see quickly. I also love a white board and cork boards for mapping out my stories and then there is also the Pinterest board for creating an Ancestor Collage. We discuss this in detail in Authentic Ancestors.

Grammar and Style Guides

I will be the first to admit that grammar is not my strong suit and feel like it might take my entire life to master. When I write I see the creative side of the craft and the rules of grammar get in the way. However, you can’t be a writer without developing your grammar skills or at the very least implementing a few tools to help you out.  There are three tools I will suggest.

 1.Grammarly

My first line of defence is Grammarly.  Grammarly is a software program you download to your computer, works much like spell check, but is much more sophisticated.  You can check out my review of Grammarly today on The Armchair Genealogist, and enter for a chance to win a one month subscription.

2. The Elements of Style, Fourth Edition by Strunk and White
This old-school standard nevers goes out of style and has prominent place on my desk. Every writer should own a copy.

3. Dictionary.com App

The Dictionary.com App is an all in one tool for today’s writer. It offers a dictionary, thesaurus, word of the day, example sentences, pronounces the word for you, and so much more. Invest the $4.59 and get the upgraded version of the app.

Notebooks

You should have an abundance of notebooks both paper and digital to help capture your ideas. Don’t forget that all important writer’s notebook we discussed earlier.  Pretty or plain, your choice, just make sure you got notebooks in place to capture your ideas and to practice your writing.

Study of the Craft

 There are many books that can help you to understand the craft of writing. I read 3-4 books a year. In my opinion, here are some of the best books you should have in your writer’s toolbox.  Some apply to all writers, while a few are specific to creative nonfiction. In my opinion they all have something to offer the family history writer.

On Writing: 10th Anniversary Edition: A Memoir of the Craft by Stephen King

Writing Creative Nonfiction by Philip Gerard

You Can Write Your Family History by Sharon DeBartolo Carmack

You Can’t Make This Stuff Up: The Complete Guide to Writing Creative Nonfiction–from Memoir to Literary Journalism and Everything in Between by Lee Gutkind

On Writing Well, 30th Anniversary Edition: The Classic Guide to Writing Nonfiction by William Zinsser


Writing Groups and Classes

 Seek out writing groups online or in your community.  Writing groups offer moral support from like-minded individuals. The critiques from fellow writers  is invaluable in your growth as a writer. The same goes for classes. There is always something to learn, I take at least one class every year. It keeps me motivated and pushing my knowledge of the craft. Look to your local University, or through the many online resources available today. I find writing groups not only offer that invaluable feedback they offer motivation and accountability.